
How To Replace A Broken Or Cracked Shower Tile

Shower Tile Replacing Tips
By Troy Cantini
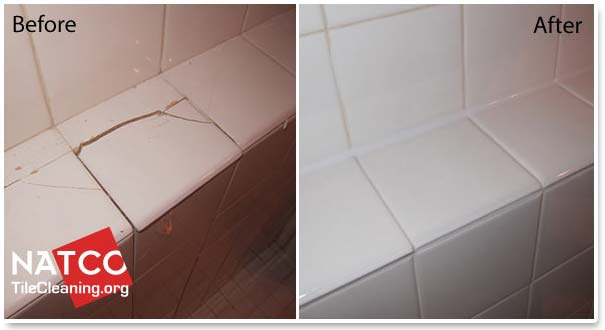
Broken or cracked shower tiles can allow water and mold to get in your shower walls so they should be replaced or repaired immediately. Small hairline cracks in ceramic tile showers do not typically allow water to get through. Larger cracks in tiles can definately allow water to get through them. Replacing the shower tiles can be a problematic and difficult task so care must be taken.
There are many reasons why shower tiles can crack and break. In many other cases there is an underlying tile installation issue that is causing the tiles to break. Sometimes the tiles were not set properly and the tile adhesive did not properly adhere to the underlying shower wall. In other cases a mastic type of adhesive was used instead of thinset and this can cause the tiles to not adhere the the shower walls and crack. Sometimes water has gotten behind your shower causing the shower walls to swell causing cracks in the tiles. If you do not plan to replace the broken tiles then you should at least caulk over the broken crack line to keep water from getting through.
There are many things that can go wrong when replacing a shower tile. Sometimes the broken tiles are securly attached to the shower walls and the shower tile will not come out without also removing a piece of the underlying shower wall. If this happens then there will be nothing to attach the new tile to. In these cases you may be forced to cut into the adjacent wall and repair the hole in the adjacent wall. Another problem is that you can crack or break additional tiles that are adjacent to the original broken tile. You can wind up needing to replace more tiles then just the original broken tile.

Many tile shower installations can develop small hairline cracks in the shower tiles. These hairline tile cracks usually do not allow water to get through the tiles and they are simply a cosmetic issue in the shower. For tiles with small hairline cracks it is usually best to just leave the shower tiles in place rather than replacing them. It is usually impossible to find an exact matching tile that has the exact same color as the existing tile. In many cases the new tile can stick out like a sore thumb and look worse than a small hairline crack.
Small hairline cracks in the tiles do not typically allow water to get through the tiles and into the shower walls. A small dab of clear silicone caulk can also be used over the hairline crack to ensure water does not get through the cracked tile. For larger cracks and broken tiles it is better to replace the tiles to ensure that water does not get into the walls of your home.
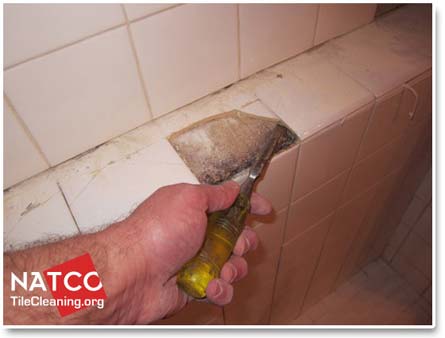
The hardest part about replacing a shower tile is removing the old tile. In some cases the old shower tiles will simply come out of the tile installation with no problems. In many other cases the broken and cracked shower tiles can be more difficult to remove. The tiles must be chipped away in small pieces with a hammer and a chisel. You should always remove the surrounding grout before removing any broken tiles. After you remove the existing tile then scrape away any high areas of thinset that was used to attach the broken tile. You should not scrape away all of the existing thinset. You only want to scrape away any high spots that may cause the new tile to sit above the adjacent tiles.
After you remove the old tile you should pick a replacement tile that closely matches the existing tiles. It may require going to various tile stores to compare different tile brands to find tiles that match your existing shower tiles.
After you have removed all of the broken tiles then you will need to attach the new replacement tile. When attaching new replacement tiles you want to ensure that the new tiles will fit in the open space left behind by the old tiles. If the new tiles are too big then they will need to be cut to fit the space where the broken tile was. You also want to ensure that the new tiles will be the correct height and will not sit lower or higher than the surrounding tiles. In most cases using a thick layer of thinset to glue the new tile in place will cause the new tile to rise above the adjacent tiles.
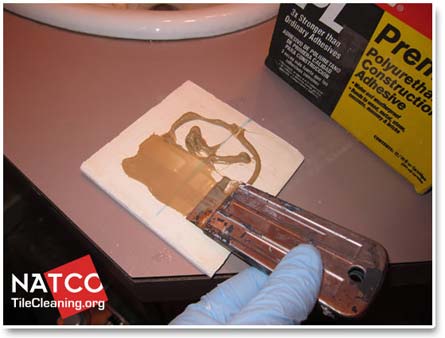
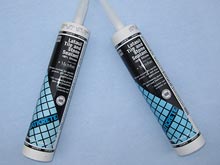
The best type of adhesive for attaching a new shower tile is a 100% polyurethane adhesive. A 100% polyurethane adhesive is waterproof and will provide and extremely strong bond with all types of tiles as well as all types of wallboards. In many cases the wallboard can be partially torn away. There can also be a layer of mastic on the wall that was holding the old tile in place. Using thinset to attach the tiles in many situations will not only raise the height of the new tile too much but it will also not bond to many different types of surfaces. The polyurethane adhesive will bond to just about any surface and provide a durable waterproof bond for the replacement tiles.
You can use a caulking gun to apply the polyurethane adhesive but you should always spread it thin so that it does not create bulk and cause the tile to rise above the adjacent tiles. If the tile sits too low you can add some more of the polyurethane adhesive to raise the tile up a little more.

After you install the tile you should allow it to set for a couple of hours before applying new grout around the tile. You should use a grout that closely matches the existing grout as much as possible.It is typically impossible to get an exact matching grout especially if you do not know which grout was used in the initial installation. Picking the most closely matching grout will help the new tiles blend in with the existing tile installation. You should then wait 72 hours for the grout to dry and then seal the grout and recaulk the shower as necessary. After the caulk dries then you can begin to use your newly repaired shower again.
NATCO Related Articles>
 Laticrete Latasil Caulk Colors
Laticrete Latasil is a high quality 100% silicone caulk that comes in a variety of colors to match most tile installations.
Read more»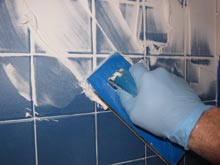 How To Regrout A Shower
Regrouting a shower is often the only way to prevent water and mold from getting into the walls of your home.
Read more» How To Install A Soap Dish
Soap dishes can break loose and fall so it is important to properly reinstall them when they become loose.
Read more»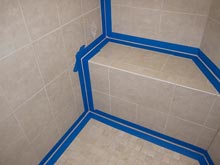 How To Re-Caulk Tile Shower
Caulk is the last line of defense to prevent water from getting from getting into your walls in a tile shower.
Read more»